thisismyrobot

Littered with robots and Python code

Detecting WiFi clients on TP-LINK routers using Python and telnetlib

Inspired by this project on Hackaday where submitter Mattia used Python to nmap scan his WiFi network, triggering alerts when particular MAC addresses are found, and with my dreams of home-automation in mind, I came up with a slightly different way of achieving the same thing.

My router is a cheapo TP-LINK, but it does come with a "currently connected MAC addresses" page in the web interface so my first thought was using BeautifulSoup to do some parsing. Then I found references to a telnet interface.

Connecting to the Telnet interface I quickly found that the command "wlctl assoclistinfo" gave me this output:

Associated stations:4
Num     Mac Address        Time
1    F0:C1:F1:22:xx:xx    00:02:30:04
2    90:21:55:B0:xx:xx    01:02:20:26
3    00:0F:54:10:xx:xx    03:09:17:28
4    74:E1:B6:2C:xx:xx    30:04:37:48 

Firing up Python and the telnetlib telnet-automation module meant that 10 minutes later I was printing comma-separated MAC addresses to the console using this snippet of code:

Finally, I am triggering this in my Raspberry Pi via a simple crontab entry:

* * * * * logger `python /home/pi/wlan_sensor/sense.py`

This gives me per-minute logging of WiFi clients, giving me the information I need to the first of my home-automation projects - turning on the lights when I get home.
Dynamic CSS updates without page refresh

I'm currently prototyping some CSS for a small webpage and this little trick occurred to me to save having to press F5 every couple of seconds (requires jQuery):

The script simple reloads each css stylesheet four times a second, giving me a near real-time CSS preview.

Sneak-peek at what I've been working on for the last six months...

Sorry about the aspect ratio, still sorting out a proper screen-caster that'll do Android and PC concurrently.


Django doctesting with WebTest

I’ve been a big fan of Python’s doctest since I first worked with Zope 3. I know a lot of people knock it, but there was always a sort of "magic" in pasting use-cases into rst documents, inserting some python and and you're done.

Recently I've been working on a number of Django applications and I really wanted to re-use this pattern.

Initially, I used the built in django.test.client - this was a fairly close approximation of Zope's testbrowser and lead to doctests like:


Where this falls down is the testing of forms - most recently I was testing the uploading of a file and the various server-side validations that would trip (name, size, contents etc). To do this in django.test.client, you must use the post() method with the following result:

The testing of file uploads is even worse.

Trying to solve this problem I came across this excellent slideshow about using WebTest. This looked like the perfect solution with its simple form access and file upload wrappers. Combining WebTest with django webtest gave me a very similar base API to django.test.client.

Here I ran into a problem though. All the demos and documentation for WebTest showed usage in unit tests. A Google search for "doctest WebTest" wasn't helpful either. Pulling out Python's dir() function, I discovered a very interestingly named class DjangoTestApp in django_webtest. A couple of minutes later and my doctests looked like this (abbreviated):


The best bit was the actual uploading of files - the "name" and "content" is just assigned to the field on the form:


This is an incredibly elegant interface and allowed me to quickly perform a huge range of upload testing.

Why not just use unittest, you ask?

Simply put, a doctest can be handed to the client, my line manager or any co-worker, and they can line it up against a set of functional requirement, or just their domain knowledge. The same simply cannot be said for something like the following (from here):

Python iRacing API client


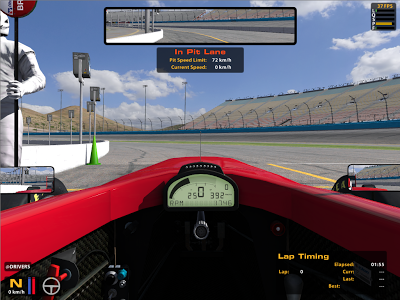
Some of you will already know that I am a massive fan of the racing simulator iRacing . I signed up to this "game" a couple of years ago and it's lead to the purchase of new computers, steering wheels and even a dedicated "racing seat".

What I've always wanted to do was build a basic motion rig for the game, something that at least would represent lateral acceleration to give me a better idea of my grip limits when driving. The first step towards this is parsing the telemetry from the game.

iRacing has a telemetry API that's solely documented in the manner of a demo client built from a pile of C code. Whilst I am certainly capable of programming in C, my preference is definitely my pet language, Python. Some brave souls have built clients in C#, but that isn't much better *

Aside from my own bias, Python is a really nice language to use as a new programmer, so developing this client should allow for more people to develop iRacing add-ons which can only be a good thing!

Anyway, I decided to build a Python implementation of a client for iRacing. The API uses a memory mapped file, something Python happily supports out of the box , as well as C data structures for all the high-frequency telemetry which I was able to parse using Python's struct module .

As I was secretly hoping, Python's dynamic-programming abilities allowed me to write a client in short order, using very little code.

The code's right here on GitHub . It's, honestly, quite rough-and-ready, but it works. Please do let me know if you have success or problems with it, I'll do my best to help out. I expect it'll be updated regularly, or whenever I find a bug...

You'll have to extend and modify it to work with your application, but that's half the fun - enjoy! :)

* Whilst I'm not a huge fan of C#, the in-line debugging/inspection functionality in Visual Studio was a god-send when applied it to the C# demo client.

My home audio streaming setup

As a slightly different post I thought I'd share the details of my multi-room audio streaming setup.

There's nothing special about it, but it's a very simple and cheap system that actually works really well, allowing multiple sources and speakers (with simultaneous playback), across a range of hardware and operating systems. I'm not going to link to every app and provide installation guides, that's what Google's for :)

The components
PC 1
  • Role(s): Source + destination + media share
  • OS: Windows 7
  • Software: iTunes (source), Shairport4w (destination), Air Playit HD (media share)
PC 2
  • Role(s): Source + destination + media share
  • OS: Windows 7
  • Software: Airfoil (source), Shairport4w (destination), Air Playit HD (media share)
Raspberry Pi
  • Role(s): Destination
  • OS: Rasbian "wheezy"
  • Software: shairport
iPad 2
  • Role(s): Media share -> destination bridge
  • OS: iOS 6
  • Software: Air Playit HD
How it all works together
Ignoring the iPad and the Air Playit HD software for a moment, the rest of the system involves Apple AirPlay sources and destinations. To be honest, I'm not a huge fan of some of Apple's work, but in this case AirPlay was simply the "right tool for the job".

Looking at the PCs, iTunes on the first one "just works", sending audio to one or more (simultaneously) destinations without a problem. Airfoil on the second PC allows audio capture from running programs (eg VLC) and sends that out in the same manner as iTunes to one or more destinations. Both PCs then perform double-duty as destinations thanks to the excellent Shairport4w.

The Raspberry Pi acts purely as a lightweight destination, thanks to the installation of shairport. I've attached an external USB sound card which helps with the sound quality.

Separately to this, Air Playit HD allows the iPad to play music/video off either of the PCs - the software on the PCs shares chosen folders and there's a client on the iPad of course. Any played music can then by pushed (via the iPad's built-in AirPlay tool) to a single destination.

These components work really well together, and allow me to scale the system really easily in the future. I hope they give you a good idea or two - let me know your versions in the comments!

Hat tip
Lifehacker's articles on setting up a Raspberry Pi and AirPlay streaming from/to all sorts of devices.

Use a Kindle and Python as a clock/dashboard


When the Kindle Wifi came out I snapped it up and it became the most used electronic device I've ever owned. Then the Kindle Touch came out and I got that too (by which point I was well on the way to becoming an Amazon fanboy...)

The only problem was that I couldn't actually read two Kindles at once.

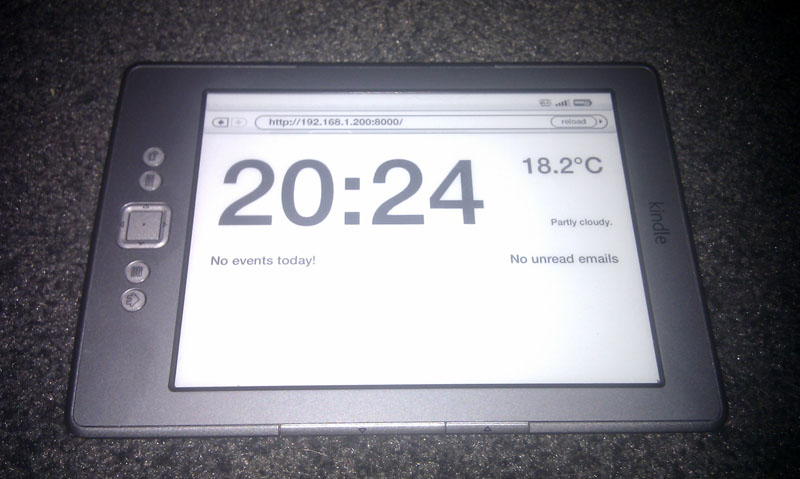
Then I came across a post by Matthew Petroff - Kindle Weather Display . This sparked my curiosity and I decided to build a clock/dashboard with the Wifi - something that'd show things like number of unread emails, weather etc. This appealed to me as the Kindle has fantastic battery life, is silent, and the e-ink display is both large and invisible at night (when I really don't want to know the time). The goal was something I could glance at in the morning before going to work and ignore otherwise.

Initially I intended to go down the route of jailbreaking to display an image like Matthew did, but I didn't have any luck with that on my particular device. It then occurred to me that I could just use the built-in web-browser to display a self-updating page. The only blocker to this was stopping the screensaver from turning on, something I was able to work around . The browser chrome was not pretty, but also not a deal-breaker.

From then on it was all about building an appropriate web site, serving it (on my desktop, but it'll work on anything running Python) and pointing the Kindle's browser at the right URL. So far, I've managed to show the time (updated on the minute), the current temperature, today's forecast and today's agenda from my Google Calendar. There's nothing magical there and as the site can be displayed on any JS-aware web-browsing device I'm sharing this project on GitHub . It'll change a lot over time but hopefully there are some basics you can use in your own project.

Enjoy!

Update 05/11/2012: I've now added a count of unread emails in my Gmail inbox so head over to the GitHub repo if you're interested in that sort of functionality for your own project. I've also got server.py working on a Raspberry Pi without modification, and it's perfectly fast enough for my use.

Getting a Logitech C270 webcam working on a Raspberry Pi running Debian


I thought it was about time I shared something after all the hours I've committed to Pi-hacking and the above title says it all. These instructions are very simple but should hopefully save you some trial-and-error.

Importantly, hat-tip to Insipid Ramblings and Hexxeh for their info and work that helped me get this far.

Firstly, I started with a slightly old version of Debian - namely the debian6-19-04-2012 image. Your results may vary depending on what version you use. I am also assuming that you have already installed the image and can successfully boot to the desktop.

So, here goes:

1. Add UVC support to the image
Download and run rpi-update as described here . This will update your image to include the initially-missing UVC support. Reboot as suggested.

2. Update your packages
sudo apt-get update
sudo apt-get upgrade

3. Install the guvcview webcam viewer
sudo apt-get install guvcview

4. Set up your permissions and enable the driver
sudo usermod -a -G video pi
sudo modprobe uvcvideo

Reboot the Pi.

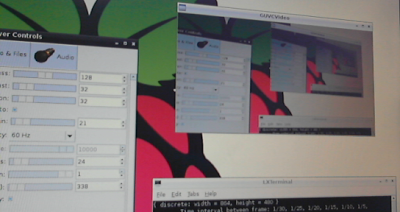
5. Open up the cam (these are the settings that worked for me)
guvcview --size=544x288 --format=yuyv

Caveats
Well, you are almost done, there are a few things to keep in mind before you rush out to buy one of these webcams for your Pi.
  • Before you view the C270 you must disconnect your mouse*. I am not sure if this is problem specific to my install but if I don't the camera will either not connect or will drop out constantly. The error I saw was along the line of not having any "periodic" USB channels.
  • The resolution is low. Clicking on the above image will open it at full size (544x288). Trying resolutions above this didn't work.
  • The webcam "must" be connected before powering up the Pi. If not you need to run sudo rmmod uvcvideo and sudo modprobe uvcvideo before it will work.
Even with this caveats, this is better than nothing and step one towards my Pi-powered mobile robot.

Hopefully this how-to helps you out and if you have more luck than I using a mouse and/or higher resolutions please let me know in the comments.

* Now, "real" Linux people would say that you shouldn't be using one anyway, but when your goal is to use a webcam, it's somewhat inferred that you'd like to see the result in a mouse-equipped GUI :-)

Installing...


Pi

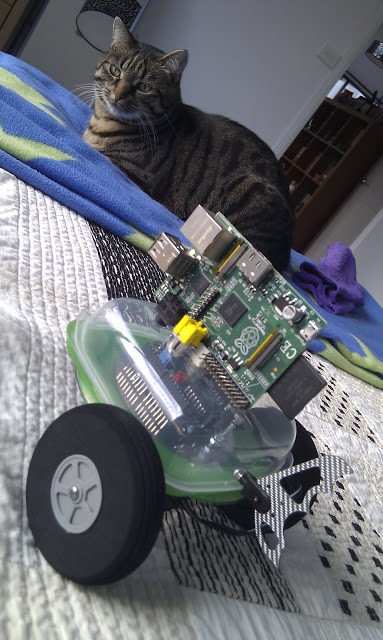
A small mobile testbed I'll be trying it out on. And a cat.
The Pi has landed.